Loading Message Card
| 첨부 '10' |
|---|
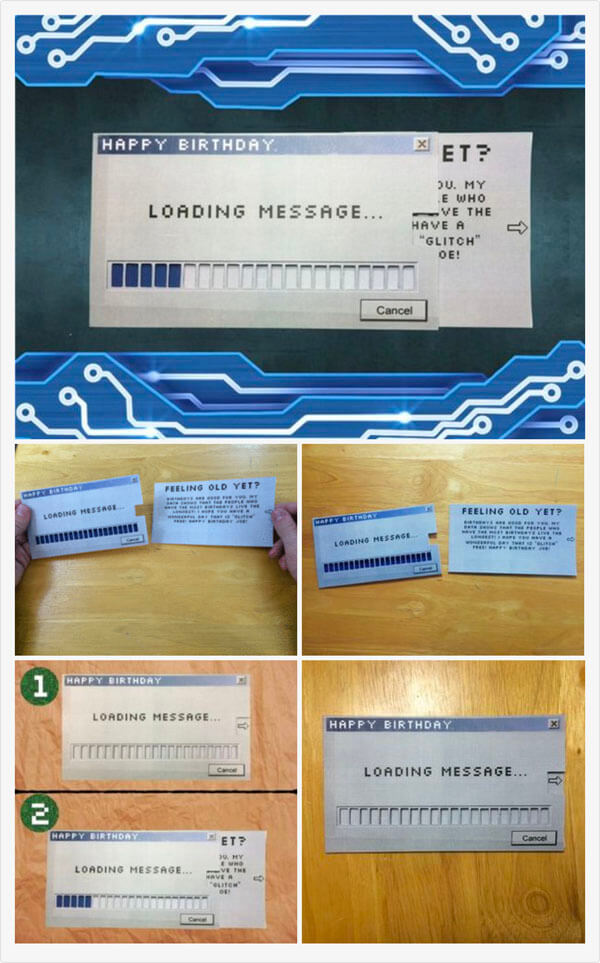

This is an awesome hand-made "Loading Message" card and it is super easy to make! Watch as you pull the card out from the envelope the bars will actually "load"! This card isn't just great for techies, its great for everyone! The card measures about 6.5 inches wide and 3.6 inches high and will fit nicely in #8 size envelope.
I have made greeting cards similar to this one before, and actually, its almost like a theme of cards with the similar style/design and I can proudly say that "It's back and better than ever!". You may have seen my other greeting card instructables ("Loading" Christmas Card" and Retro Valentine's Day Card) before and think "why did he make another one?". Well, this one is customizable!
Located in step 2 are 3 files; A .docx file, a .pages file and a PDF. This way it doesn't matter whether you have a Mac OS or a Windows OS, you'll be all set either way! With these documents you can edit the text on the card and/or replace it with your own personal message!
As you can see in the photos, this card was specially designed to look like an old computer's loading window. Also, there are various improvements in the way the card was designed compared to my previous ones. Now what are you waiting for? Let's get started!
Step 1: Supplies
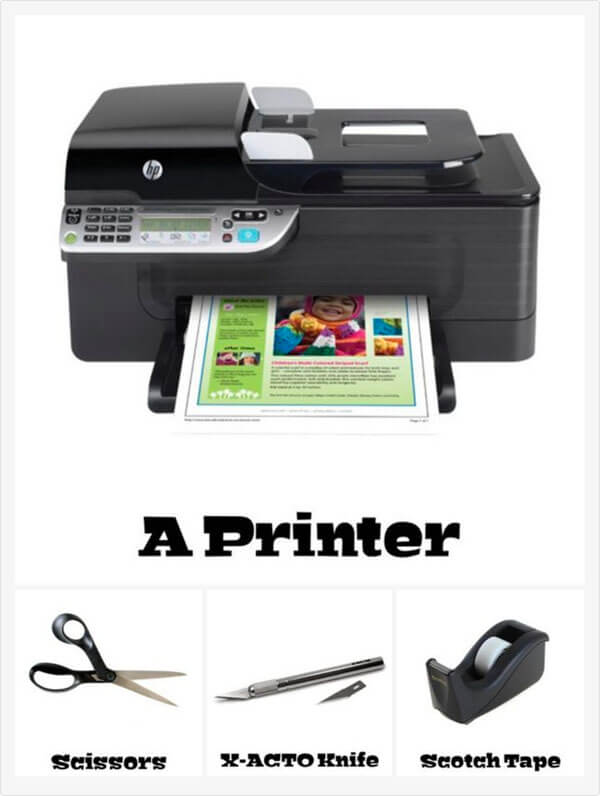
To make this card you will need:
Scotch Tape
Scissors
An X-ACTO Knife
A Printer
2 Sheets of White Card-stock - not shown in photos
Something To Cut On (i.e. A Cutting Mat) - not shown in photos
Step 2: Customizing Your Card
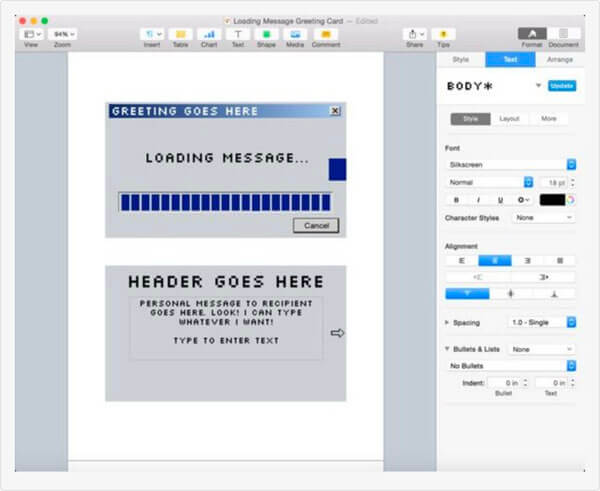
As mentioned in the intro, you can customize the card! But before you can begin customizing your card you will need to download and install the "silkscreen" font from fontsquirrel.com. Once you have downloaded and installed the font you may be begin customizing your card! To do this you will need to download the appropriate file from this step (If you have Windows, download the ".zip" file; it contains the ".docx" file. If you have a Mac download the ".pages" file).
If you don’t have Microsoft Word or Pages you can download the PDF and manually add your own text to the card. The PDF does not have any editable text fields, but you can easily add your own using just about any software. After you have downloaded the appropriate file, add/edit text to your satisfaction. Once you are pleased with the results print both pages on to sheets of white card-stock.
Windows users: Download the ".zip" file; it contains the ".docx" file.
Step 3: Cutting
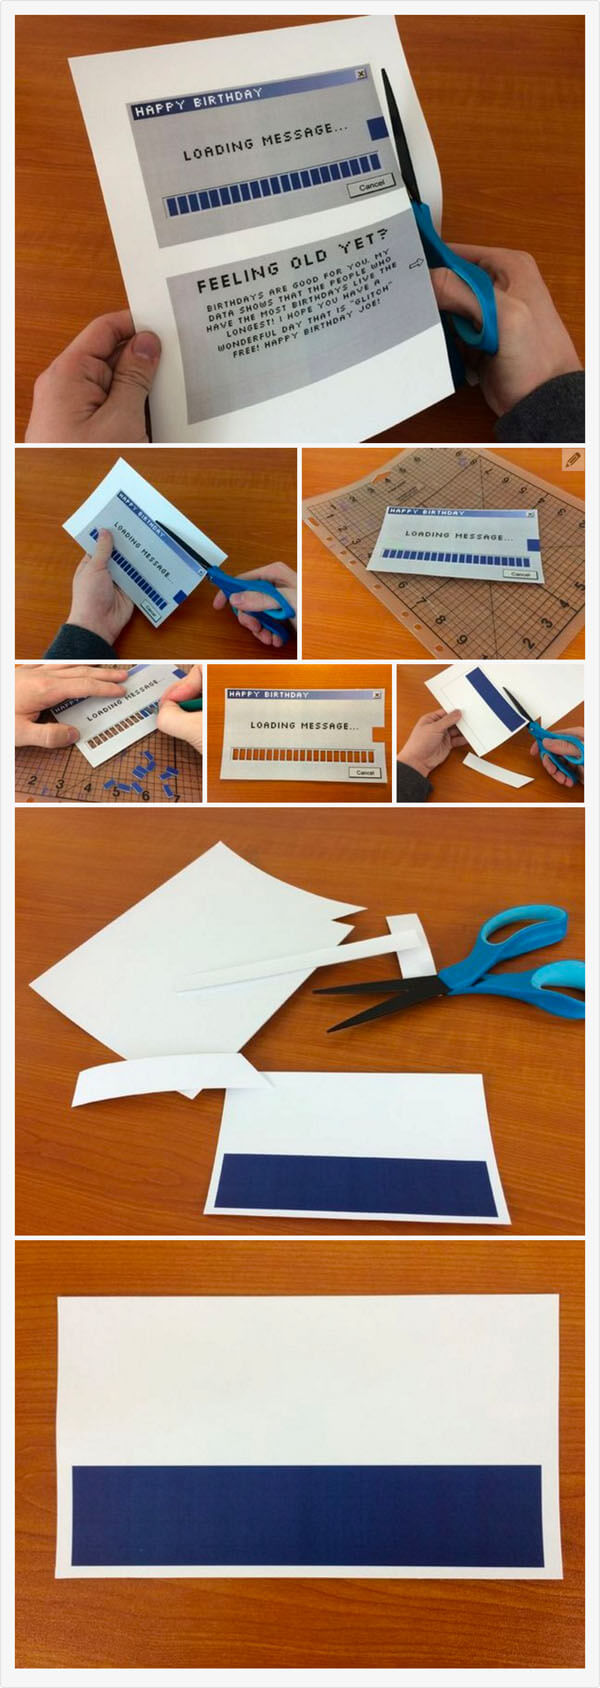
Use a pair of scissors to cut out all the 3 parts of the card from the 2 sheets of paper you just printed. Then use an X-ACTO knife to remove all of the dark blue rectangles from the front of the card. This can be tedious, so just take your time and make sure that you are giving it your best! This will also be very strenuous on your hands so if you need, every few rectangles put the knife down, flex your hand, and resume cutting. Don't forget to cut out the bigger one on the far right of the card.
Step 4: Assembling
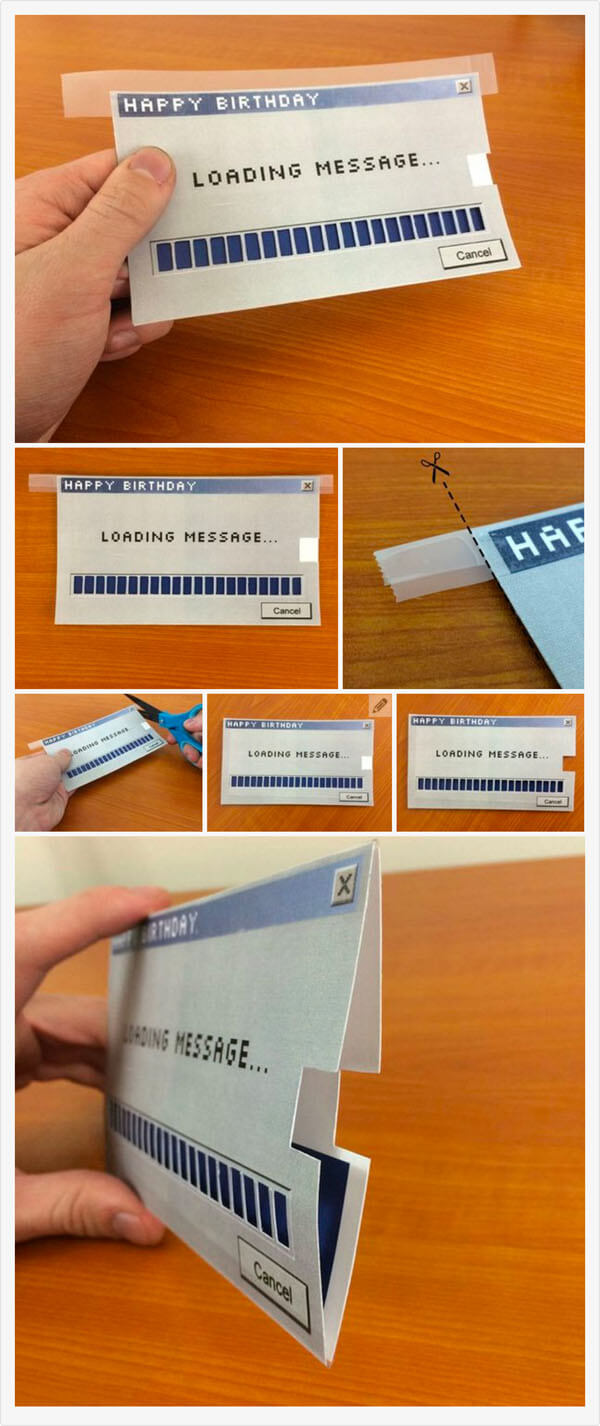
Now its time to assemble the card! Place the front of the card onto the back of the card (the mostly white piece). Make sure they are lined up exactly on top of each other. Also make sure you can see the dark blue coloring through the holes on the front of the card. Now place a long strip of tape across the entire top edge of the card, leaving half to hang off. Fold the tape that is hanging off over to the back of the card. If you have any excess tape like as shown in the photos, use your scissors to cut the excess tape off. In other words, what you are really doing is making a pouch by taping closed the edges of the card from the outside. Do this to all of the edges of the card except the right edge. Then, using scissors, cut the white square out from the right side of the card.
Step 5: Finishing
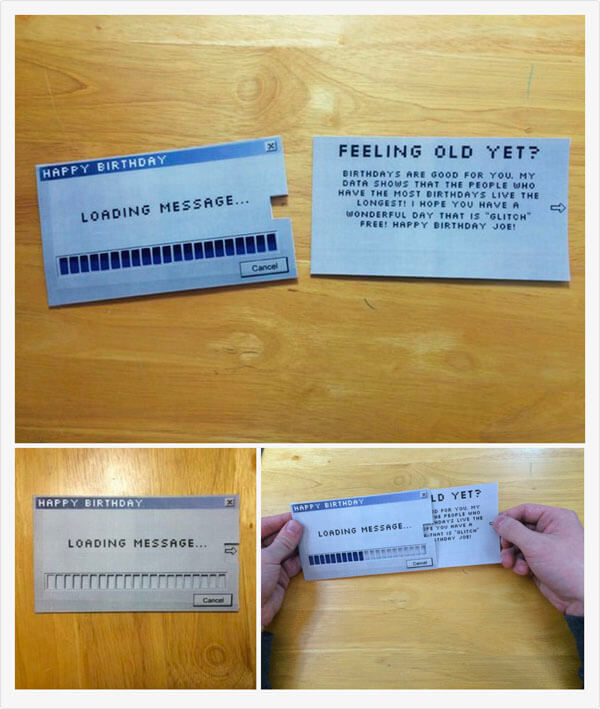
Now all you have to do to is insert the remaining piece with your personal message into the "pouch" you just made. It may be a tight squeeze, so if the card doesn't slide in out of the pouch easily, you may need to trim it down a little on the top and bottom. That's it! Your done!
[출처] http://www.instructables.com/id/Loading-Message-Card/
| 번호 | 분류 | 제목 | 글쓴이 | 날짜 | 조회 수 |
|---|---|---|---|---|---|
| 277 | FreeTalk |
세상에서 가장 아픈 화살 한 발
|
hooni | 2017.05.22 | 1410 |
| 276 | FreeTalk |
후니넷에 접속하는 검색 키워드
|
hooni | 2018.03.19 | 1422 |
| 275 | FreeTalk |
영혼의 존재를 밝히려는 실험#2
1 |
hooni | 2015.08.03 | 1431 |
| 274 | FreeTalk |
YG신인 비아이...대박 사건
|
hooni | 2014.11.14 | 1435 |
| 273 | FreeTalk |
“용도만큼 다양한” 라즈베리 파이 운영체제 10선
|
hooni | 2014.11.11 | 1440 |
| 272 | FreeTalk |
내가 생각하는 나쁜 녀석들 명대사
|
hooni | 2018.04.05 | 1449 |
| 271 | FreeTalk |
OS X 미리보기(Preview)의 활용성을 끌어 올리는 20가지 기술 모음
|
hooni | 2014.10.23 | 1456 |
| 270 | FreeTalk |
아이폰6s 느려짐 현상 원인은 '노후 배터리'
|
hooni | 2017.12.28 | 1471 |
| 269 | FreeTalk |
금수저한테 일침 가하는 레전드
|
hooni | 2018.04.12 | 1497 |
| 268 | FreeTalk |
'눈물의 간장게장'…모성애 자극
|
hooni | 2014.08.21 | 1520 |
| 267 | FreeTalk | (스압) 천재 이야기가 나와서 풀어 보는 폰 노이만 썰 | hooni | 2014.11.28 | 1551 |
| 266 | FreeTalk |
그란데 아메리카노를 벤티컵에 진하게 해주세요!
|
hooni | 2019.02.01 | 1555 |